Easy & Fun! Build your own Honeycomb Container Garden
Square Foot Gardening in a DIY Hexagonal Garden Container
Even with two left hands you can build your own DIY Honeycomb Garden containers. With a saw, the right kind of wood, some screws and a screw gun you can make a hexagon garden container in less than one hour.
A local hardwood is favourable, or pinewood like Douglas Fir (will not last as long as hardwood) is suitable to construct the edge of your container.
For the example below I have used Douglas Fir boards of 250 mm (= 10 in) high and 25 mm (= 1 inch) thick.
1. Building the edge of the container.
Cutting the wood. Cut the wooden boards into 6 even parts.
The length of the boards should be in between 40 cm and 70 cm (= 15,7 - 27,5 in). Shorter boards will make a smaller container, longer will make it bigger.
I recommend to not make the parts bigger than 70 cm; the container would become to big to reach the center easily.
Cut both of the end faces of each parts into an angle of 60 °.
It's most easy to do this with an electric shortcut saw.
When cutting wood, please be sure to wear safety glasses and gloves and fix the wood well.
 |
| Fix the Anti-Root Fabric on the 2 corners of 1 side first. Then alongside the edge. Repeat with all 6 sides. |
Fixing the boards. Use Stainless steel screws of 5mm by 50 mm for fixing the boards together. Place the ends of the boards in an angle of 120 ° and fix the boards with clamps to the workingbench so they don't move while fixing the boards.
Before putting in the screws pre-drill holes of 4 mm width alongside both end faces of the boards to prevent splitting of the wood!
2. Placing the wooden container
 |
| A staple gun is a handy tool for fixing the fabric onto the wooden edge |
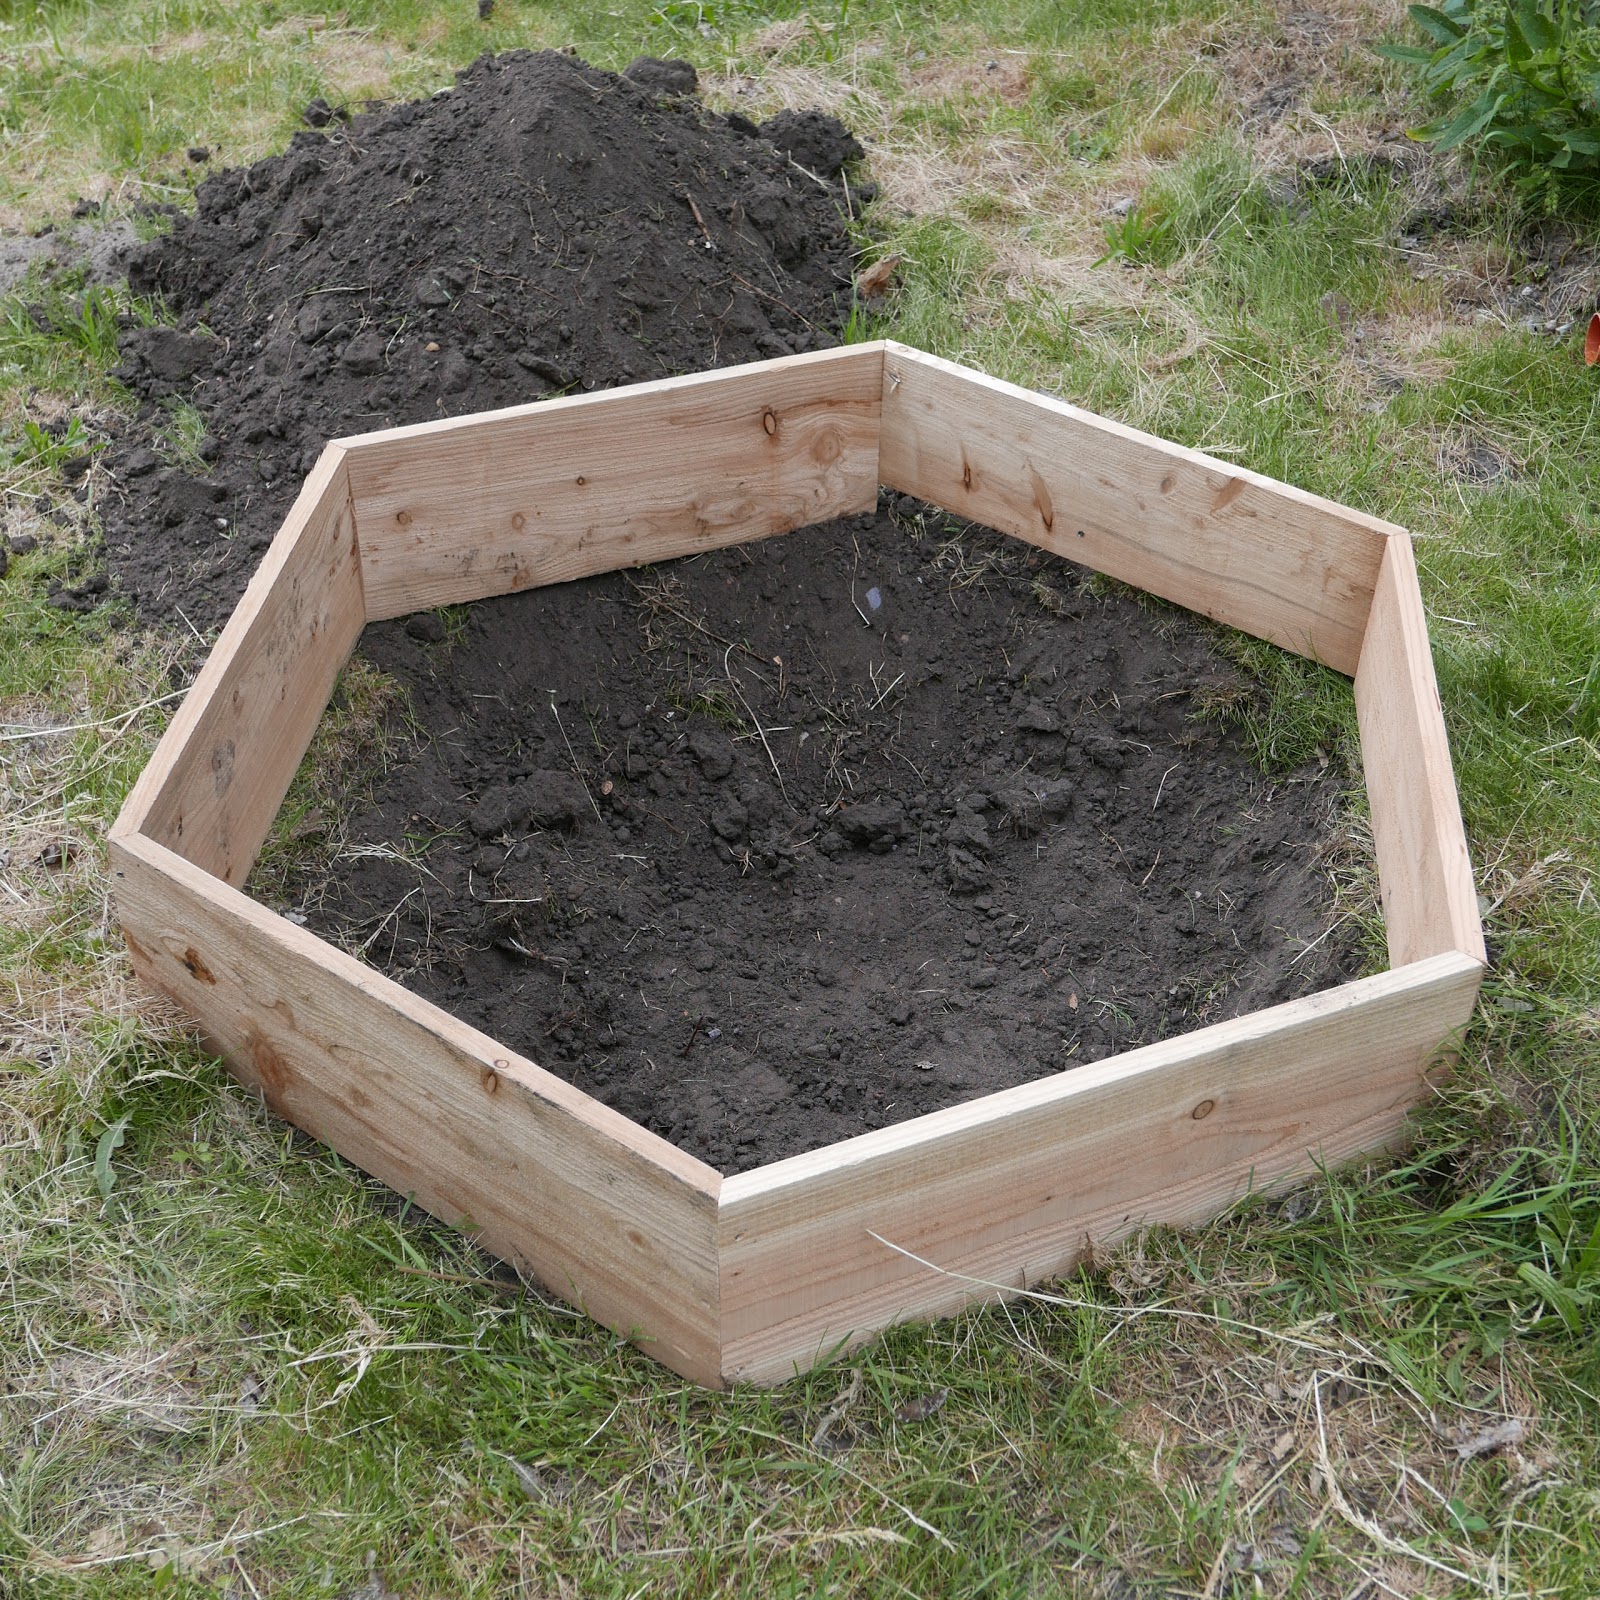
Lay the hexagon shape flat on the ground.
Copy the shape on the ground. Use a spade or knife and follow the shape of the inside of the hexagon to draw the hexagon on the ground.
Digg a hole. Remove the wooden edge and digg a hole of approx. 25 cm (= 10 in) deep in the shape of the hexagon.
Make sure the hole is less wide than the wooden edge, so the edge will rest on the ground and does not fall in the hole!
 |
| Anti-Root Fabric helps to keep grass and unwanted plants out of the container garden. |
 |
| Add the old soil first. |
3. Cover the inside of the container with Anti-Root Fabric
Anti Root Fabric. Cut a piece of anti-root fabric with a pair of scissors. The fabric helps to protect the wood and keeps unwanted plant roots out of the container.
To get the right measurements you place the wooden edge on top of the fabric and cut around it. Cut the piece bigger than the wooden edge. The fabric will have to be at least 60 cm (= 23 in) wider on all 6 sides than the wooden edge.
Place the wooden container back on top of the hole in the ground.
Fixing the fabric. Fold one edge of the fabric and place it alongside one of the 6 sides of the wooden container.
First fix the 2 corners with staples or nails. Than fix the fabric in between the corners.
Do this with each of the 6 sides.
Folding the fabric so it fits nicely is a bit of a challenge. Try to make sure there are no air pockets inbetween the fabric and the bottom of the hole.
It can help to sit inside the container, or throw some soil on top of the fabric to keep it fixed on the bottom of the pit while fixing the fabric alongside the edges.
 |
| Shred cardboard and make a thick layer of it. Cardboard works well to retain water in the container. |
4. Bottom of the Honeycomb Garden
If you made the hexagon-shaped pit in your garden soil, you can reuse the soil to refill your garden container. If you made the pit in sandy ground, please only use (biological) garden soil to fill the container.
Bottom layer. Fill the bottom of the container with a layer of about 10 cm (= 4 in) thick of (old) soil.
Cardboard. On top of this you make a layer of shredded cardboard. Use uncoloured brown cardboard and remove any plastic labels and tape.
The layer of cardboard can be about 10 cm thick (= 4 in).
 |
| Watering the bottom layer with rainwater. |
Finishing the bottomlayer. On top of the cardboard you put a layer of the rest of the old soil, or a layer of new soil of approx 15 cm thick (= 6 in).
Water. Wet the cardboard and the soil on the bottom of the container.
If possible use water from a stream or ditch, or collected rainwater. This water is more alive and full of beneficial micro-organisms.
(Note: Please make sure the water is safe for use on the garden and is not from a polluted source!)
5. Cut and drill the HDPE Tube
 |
| HDPE tube with 10 mm holes. |
Make sure if using another material that the tube is made of Food Grade Plastic!
Cut the tube. Cut the tube with a regular handsaw for wood. Cut a piece of 50 - 60 cm long (= 19 - 23 in).
Drill holes. Use a drill bit fit to drill in metal to make the holes for the composting worms to migrate from the tube to the garden and vice versa. Use a drill bit with gauge BS5 (7⁄16 in) or 10 mm.
Make about 20 holes in the bottom 40 cm (= 15,7 in).
Fix the tube with a clamp on to the workbench while drilling the holes and please use protective clothing and eyewear!
 |
| Fill the Honeycomb Garden with organic garden soil & Vermicompost. |
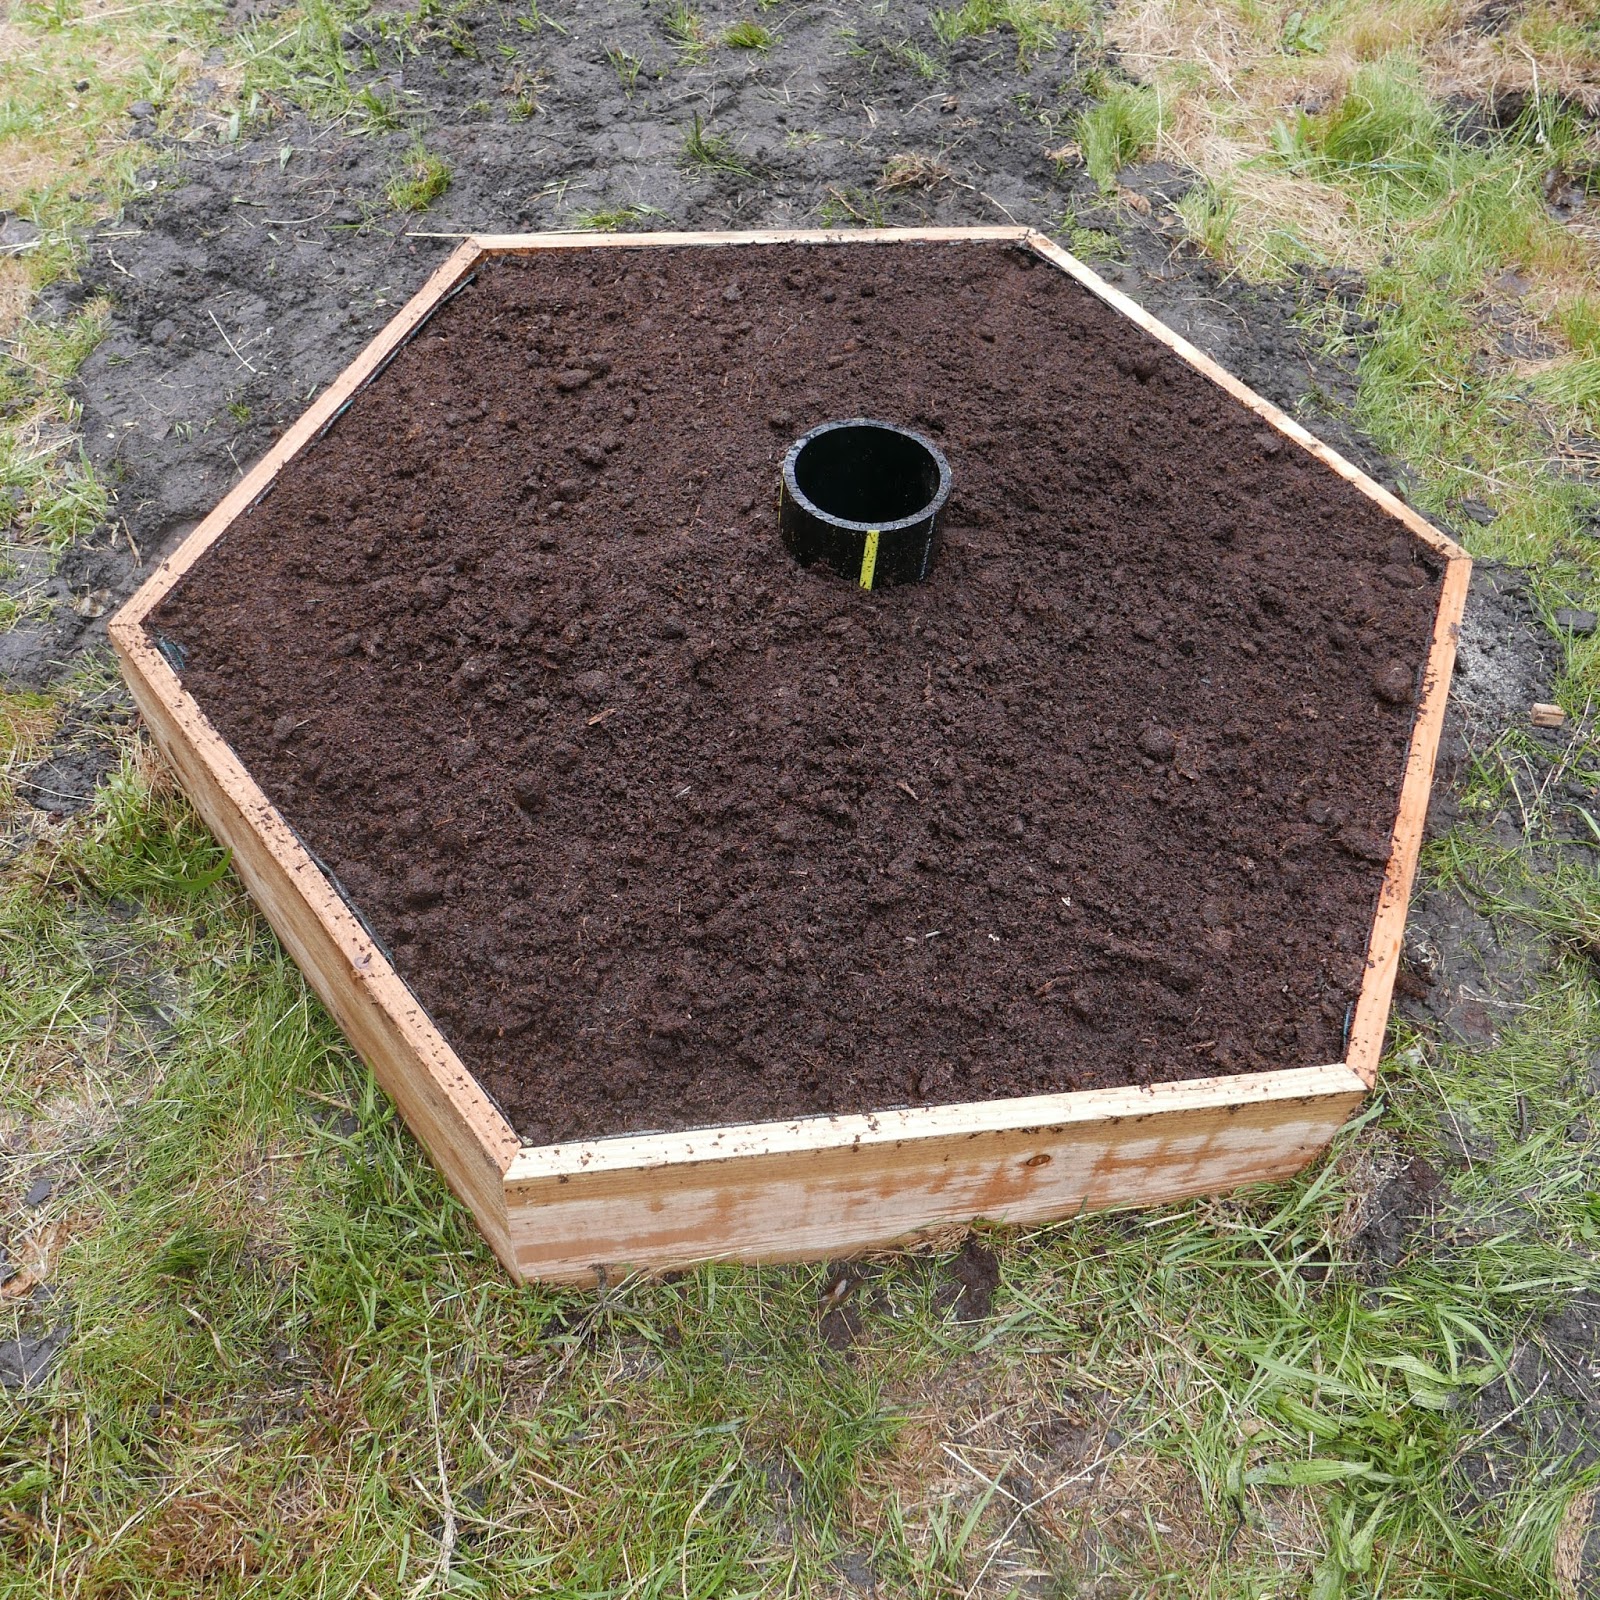
Place the tube. Place the tube in the heart of the container.
If your garden container is the right size you should reach the tube easily by stretching your arm while not leaning on the soil.
Cover the tube. You can close the tube with a cap or piece of wood to prevent rats or mice to enter the tube and eat the organic waste inside.
If you use a tight fitting cap you might want to drill some holes to allow rainwater to enter the tube to keep the composting material inside moist.
6. Filling the Honeycomb Garden with soil & worm castings
 |
| Use sticks or rope to make a division. |
Soil. Use a healthy organic garden soil to fill your container garden. Fill the container to the edge and build up to the center of the container to create a little hill.
The HDPE tube should still stick out two fingers above the soil. Don't push the soil down, keep it fluffy.
Compost. Add a layer of compost. If available use a layer of 1 to 2,5 cm (= 1/2 to 1 in) of pure worm castings and mix in with the soil.
If you have some vermicompost available or regular compost you can add up to 8 cm (= 3 in) as a mulch instead of the castings.
 |
| By making a little hill you have increase the surface of the garden. |
7. Divide the hexagon & Plan your harvest by using a Sowing Calendar
Clear devision. Use a rope, pieces of wood or sticks to divide the hexagon in 6 triangels.Each triangle can be used to grow 1 type of plant.
More harvests per year. By using a sowing calendar you can have more than one harvest per triangle. After harvesting one crop a new one can be planted.
For the UK & Europe please see this Sowing Calendar (choose your country on top left).
For the USA please see this Sowing Calendar (choose the state or climate zone where you are living).
 |
| Adding the composting worms to the HDPE tube in the Honeycomb Garden |
8. Composting worms feed the garden
Small eco-system. Place a handful of composting worms in the HDPE tube at the center of your Honeycomb Garden. The worms will migrate through the garden using the holes in the tube.The worms are at the base of a healthy garden. Digesting organic matter & helping to build a strong Soil Food Web is what they are good at.
Feed the garden with your organic waste.
You can add little bits of organic waste (uncooked, unprocessed plant material + egg shells, coffee grounds & tea) to the tube to feed the worms. The worms will digest the material and their worm castings (worm poo) will feed the soil life and the plants in the garden.
Check if the worms are digesting the material you offer before adding more.
9. Plant something Yummy & Beautiful in your garden.
Plant what you eat. Choose herbs, fruits & veggies that you use regularly in the kitchen so you love using what you grow.
Plant for Pollinating insects. Adding flowering plants to your garden makes the garden look great! It also attracts insects that are essential for growing fruit and help reduce pests.
Plant for Pollinating insects. Adding flowering plants to your garden makes the garden look great! It also attracts insects that are essential for growing fruit and help reduce pests.
Visit your garden regularly. If you love to eat what you grow & like to look at the colours of the plants & like to see the little creatures that visit your garden, you will like to go there often. Passing by often will help maintaining the garden with ease. It won't be much work to keep weeds at check and harvest the goodness of your garden.
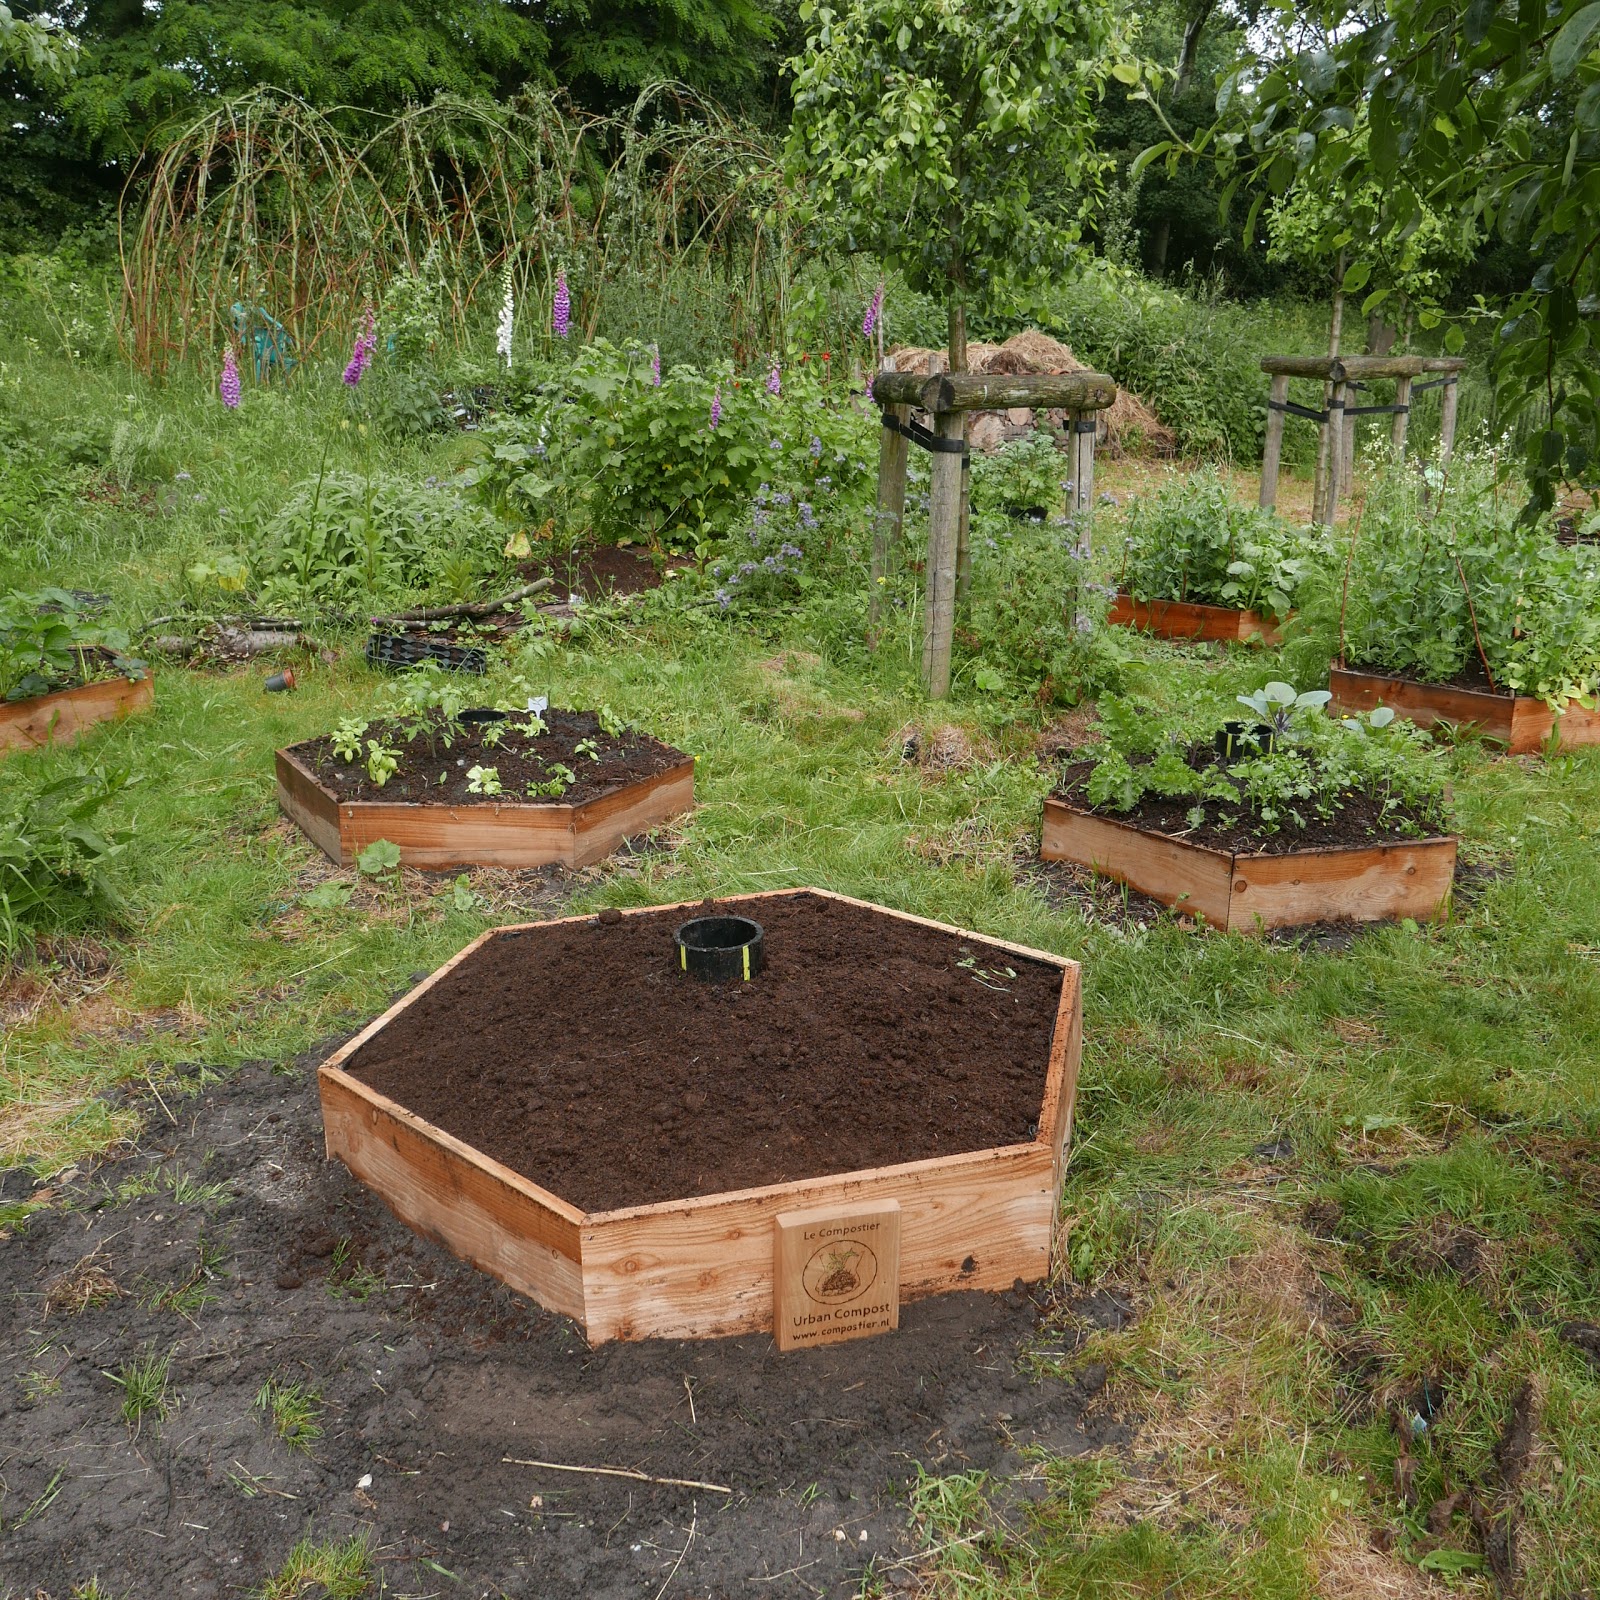 |
| A playful effect by using different size hexagon garden boxes in combination with fruit trees and Hügel cultures in the Community Garden. |
Text and images are owned by Rowin Snijder. All images and text are copyrighted. Use of any images or text (or part of the text) is not permitted without written authorisation.
Geen opmerkingen:
Een reactie posten